Isaac Lab is a reinforcement learning (RL) framework built on top of NVIDIA Isaac Sim, designed to simplify the creation and management of simulated robotics environments.
In this post, we’ll walk through how to build the most basic example in Isaac Lab: an empty simulation scene.
Although simple, this example introduces essential components such as:
SimulationCfg setupSimulationContext initializationMastering this foundation will help you scale to more complex simulations later on.
https://isaac-sim.github.io/IsaacLab/main/source/tutorials/00_sim/create_empty.html
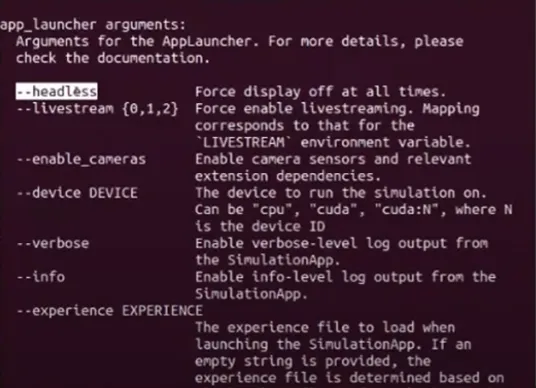
Isaac Lab is primarily designed to run in a command-line interface (CLI) environment to optimize performance and scalability.

The AppLauncher enables customized runtime configurations using CLI arguments.
Common CLI flags include:
-headless: Run without GUI-device cuda: Use CUDA-capable GPU-enable_cameras: Activate camera sensors-livestream: Enable live streaming-verbose / -info: Debug and log output-experience: Load predefined environment JSONs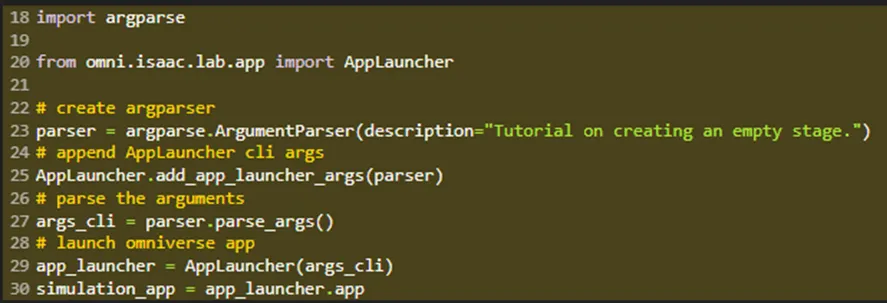
You can use Python’s argparse to handle CLI inputs:

Then launch the simulation with:
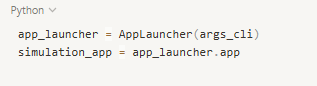
This initializes the Omniverse simulation app and gives you control over its behavior.

To launch a simulation, you’ll need two key components:
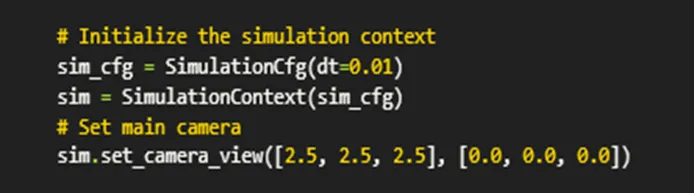
1. SimulationCfg
Isaac Lab’s default simulation configuration class.
It defines:
device: Target device (e.g., "cpu" or "cuda:0")dt: Physics time step (e.g., 0.01 = 100Hz)physics_scene: Settings like gravity, collision rules, and friction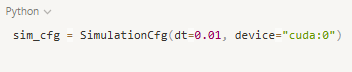
2. SimulationContext
This wraps the actual simulation engine.
It uses the config to initialize the simulation backend.
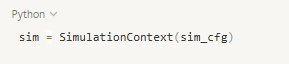
You can later call methods like sim.play(), sim.pause(), or sim.step() to control the simulation flow.

To visualize the simulation properly, set the camera position using:

[x, y, z]This determines the initial viewpoint in the scene.
Before you start simulating, always call:
sim.reset()
This initializes the simulation timeline and avoids errors caused by uninitialized physics handles.
Failing to reset might lead to crashes or invalid behavior.
Once everything is initialized, use a loop to run the simulation:
while simulation_app.is_running():
sim.step()
print("Step completed")
sim.step() executes one physics frameprint() provides step-by-step logs (especially useful in headless mode)This loop is the heartbeat of your simulation.
This tutorial walks you through the foundational steps for creating an empty simulation scene in Isaac Lab.
While basic, it introduces key components that will be reused and expanded in more complex examples:
SimulationCfg and SimulationContextMastering this setup will prepare you for more advanced tasks like:
Share this post: