In Isaac Lab, defining a robot’s configuration is a core part of creating simulation environments and running reinforcement learning tasks. This configuration is written using the ArticulationCfg class, which specifies how the robot is loaded, its initial state, and how its joints are actuated.
In this post, we’ll walk through how to create a custom robot configuration in Isaac Lab using ArticulationCfg, breaking down its key components with examples.
This guide is based on the official tutorial:
https://isaac-sim.github.io/IsaacLab/main/source/how-to/write_articulation_cfg.html

The ArticulationCfg object in Isaac Lab is the central configuration for defining a robot as an articulated asset in the simulator. It consists of three main components:
Once defined, this configuration can be reused across multiple simulation environments and learning tasks.
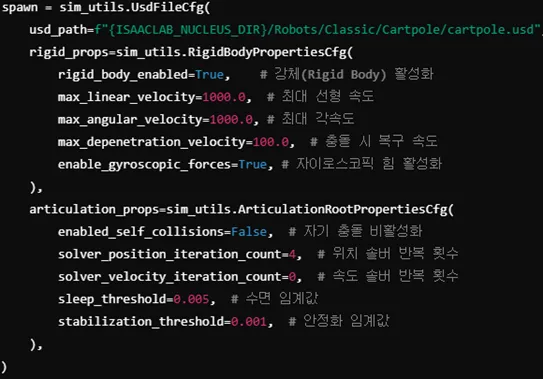
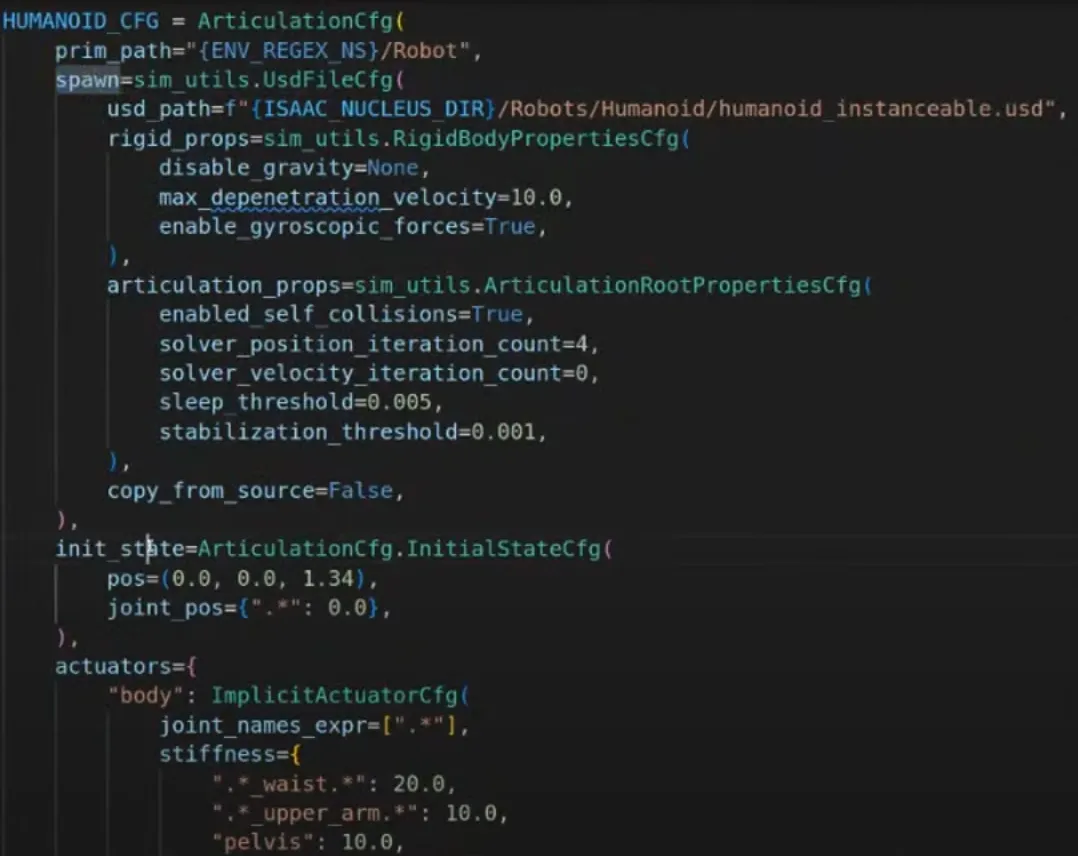
The spawn section defines how the robot is imported into the simulation.
You can use either a USD file or URDF file to load the robot.
Key parameters include:
usd_path: Path to the robot’s USD filerigid_props: Physical properties of the robot (mass, joint limits, etc.)articulation_props: Settings like self-collision, solver iterations, etc.This section ensures that the robot’s body and joints are initialized with proper physical properties in the simulator.

The initial_state section defines the robot’s position and joint configuration when it first spawns into the simulation.
pos: World-space position [x, y, z]rot: Optional orientation (e.g., quaternion)joint_pos: A list or tensor of initial joint positionsThis helps ensure the robot starts in a meaningful pose, like a standing position or zeroed configuration.
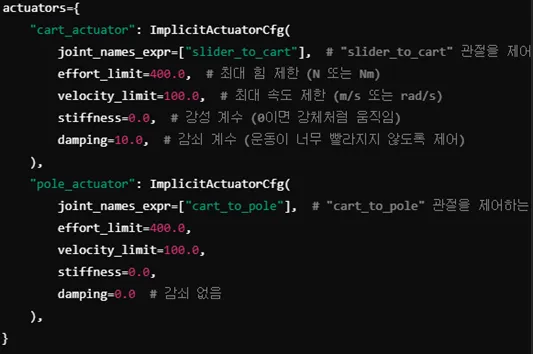
To control the robot, you must define actuator configurations for its joints. Isaac Lab supports:
Actuators specify how target forces, positions, or velocities are applied to each joint.
For reinforcement learning, it's critical that actuators are correctly configured to match your policy’s output.

Once defined, your custom ArticulationCfg can be imported and used like this:
from omni.isaac.lab_assets import HUMANOID_CFG
Then referenced in a scene using:
humanoid: ArticulationCfg = HUMANOID_CFG.replace(prim_path="{ENV_REGEX_NS}/Robot")
replace() allows you to override the robot’s prim path to match the current simulation scene structure{ENV_REGEX_NS} ensures the robot is placed within a specific environment namespace (useful for multi-env RL)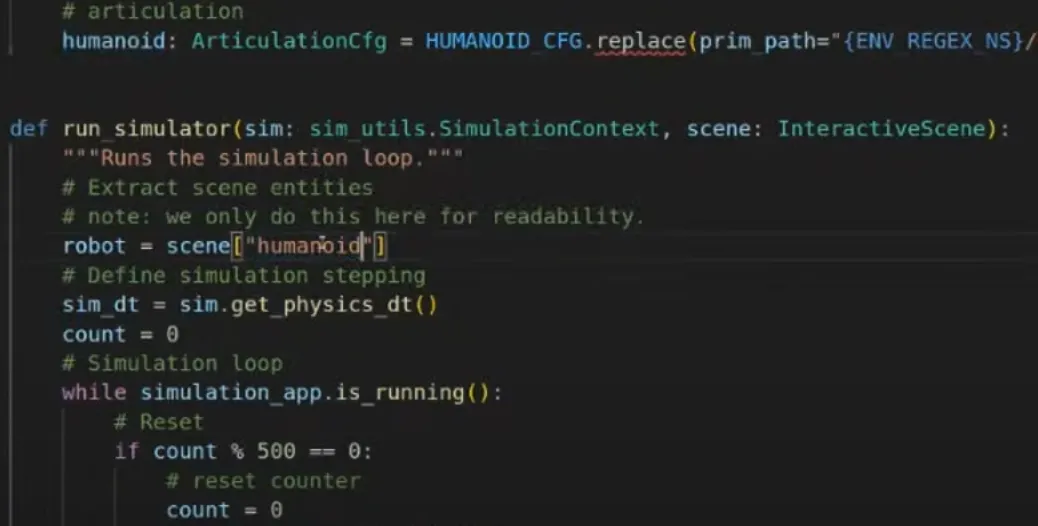
To validate the configuration, you can test the robot by applying random joint forces in the simulation loop:
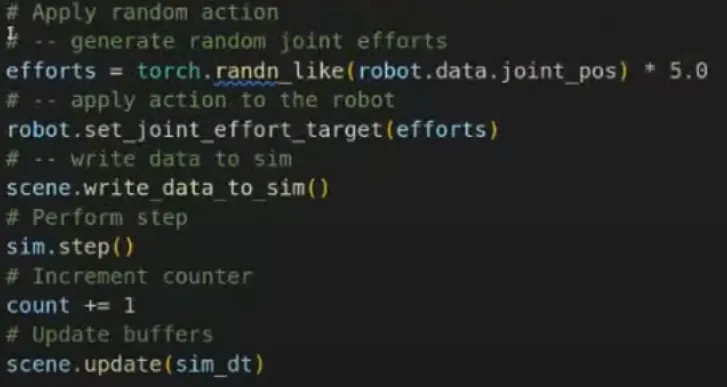
efforts = torch.randn_like(robot.data.joint_pos) robot.set_joint_effort_target(efforts)
This method applies random effort (torque/force) values to each joint, allowing you to visually confirm that the robot is reacting as expected in simulation.
In this post, we walked through how to write and use an Articulation Configuration (ArticulationCfg) in Isaac Lab to define a robot for simulation and learning.
These configurations include:
Once configured, your robot can be instantiated in multiple environments, used in interactive scenes, and trained using reinforcement learning techniques.
Key Takeaways:
ArticulationCfg is the foundation of any robot in Isaac Lab@configclass to define reusable and readable config structuresrun_simulator() to validate joint control and motionThis knowledge lays the groundwork for building complex robot learning pipelines inside Isaac Lab.
Share this post: